RSS

Peanut-Butter Truffles


1 cup  cocoa powder
1/2 cup  confectioners' sugar
1   (10-ounce) package peanut-butter chips
1/2 cup  heavy cream
1/4 teaspoon  vanilla extract
2 tablespoons  butter, softened


Combine cocoa powder and confectioners' sugar in a shallow bowl; set aside.

Place peanut-butter chips in a heat-proof bowl. In a saucepan, bring cream and vanilla extract to a simmer over low heat. Pour over peanut-butter chips. Stir until chips are completely melted and blended in. Let the mixture cool until it is just slightly warm to the touch.

Add butter, stirring until melted and well-blended. Cover with plastic wrap and refrigerate for at least 1 hour.

Scoop peanut-butter mixture by teaspoonfuls and roll into balls. Roll each ball in cocoa mixture and place on a cookie sheet covered with waxed paper or parchment paper. Cover with plastic wrap and refrigerate until firm.


Courtesy: Taste of the South
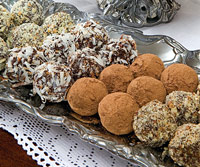
Triple-Chocolate Mocha Truffles


12 ounces  semisweet chocolate, coarsely chopped
1/2 of an 8-ounce package  cream cheese, softened and cut up
4 teaspoons  instant coffee crystals
1 teaspoon  water
1-1/3 cups  milk chocolate pieces (8 ounces)
2 tablespoons  shortening
2 ounces  white chocolate, coarsely chopped


    In a heavy medium saucepan, melt semisweet chocolate over very low heat. Remove from heat and stir in the cream cheese until combined.

    Stir together the coffee crystals and water. Add the coffee mixture to the chocolate-cream cheese mixture and stir until smooth. Cover and chill for about 2 hours or until firm.

    Use 2 spoons to shape the mixture into 1-inch balls. Place on a waxed-paper-lined baking sheet or tray. Cover and chill for 1 to 2 hours or until firm.
    In a heavy medium saucepan, melt milk chocolate and shortening over low heat, stirring until smooth. Remove from heat and cool to room temperature.
    Use a fork to dip truffles into milk chocolate mixture, allowing excess chocolate to drip back into saucepan. Return truffles to baking sheet; chill for about 30 minutes or until firm.
    In a heavy, small saucepan, melt the white chocolate over low heat, stirring until smooth. Drizzle over tops of truffles. Chill for a few minutes until set. Store in refrigerator. Let stand at room temperature for about 30 minutes before serving. Makes about 30 truffles.


Courtesy: Midwest Living

Oreo Truffles


1 18-oz. pkg.  chocolate sandwich cookies with white filling, finely crushed
1 8-oz. pkg.  cream cheese, softened
1 lb.  white baking chocolate, melted

Directions
1. In large bowl combine crushed cookies and cream cheese. Beat with mixer on low speed until well blended. Form 1-inch balls by hand. Dip balls in white chocolate; place on baking sheet covered with waxed paper. Refrigerate 1 hour or until firm. To store, cover and refrigerate. Makes 50 truffles.


Candy-Cane Sticks


1 tube (16.9 ounces)  refrigerated sugar cookie dough
1/2 cup  finely crushed peppermint candy canes
1/2 teaspoon  peppermint extract
3/4 cup  all-purpose flour
3/4 cup  confectioners' sugar


1. Heat oven to 350 degrees F. Line a large baking sheet with nonstick foil. Set aside.

2. In a large bowl, knead together cookie dough, 1/4 cup of the crushed candy canes, the peppermint extract and flour to incorporate all of the ingredients.

3. Break off a level teaspoon of dough and roll into a 4-1/2 to 5-inch-long rope. Transfer to prepared baking sheet, spacing each rope at least 1 inch from the others. Repeat until sheet is full; refrigerate dough in between batches.

4. Bake at 350 degrees F for 7 minutes, until puffed and just beginning to color. Transfer to a wire rack to cool.

5. Stir together confectioners' sugar and 4 teaspoons water until smooth to form a glaze. Brush glaze over wands and let dry. With a small paintbrush, use remaining glaze to paint stripes diagonally across wands, spacing about 1/2 inch apart. Sprinkle wet stripes with some of the remaining crushed candy to resemble a candy cane. Let dry completely. Store in airtight container up to 2 weeks.


Courtesy: Family Circle

Twice-Baked Potatoes


2 large Yukon Gold potatoes (about 1 pound)
2 teaspoons olive oil
1/2 teaspoon salt
3 tablespoons milk
2 tablespoons butter or margarine
2 tablespoons dairy sour cream
1 tablespoon snipped fresh chives
1/4 cup finely shredded Gruyere or Swiss cheese (1 ounce)
Salt
Ground black pepper
Snipped fresh chives (optional)

Preheat oven to 400F. Scrub potatoes thoroughly with a brush; pat dry. Prick potatoes with a fork. Drizzle olive oil over each potato and sprinkle with salt. Wrap each potato in foil. Bake potatoes in the preheated oven about 1 hour or until tender. Remove and discard foil. Let potatoes stand about 15 minutes to cool slightly. Cut the potatoes in half lengthwise. Carefully scoop pulp out of each potato, leaving a 1/4- to 1/2-inch shell; set potato shells aside. Place potato pulp in a large bowl. Mash potato pulp with a potato masher or an electric mixer on low speed until nearly smooth. 

In a 1- to 1-1/2-quart saucepan heat milk and butter over medium heat until butter is melted. Pour milk mixture over mashed potatoes; beat until smooth. Stir in sour cream, the 1 tablespoon snipped chives, and 2 tablespoons of the cheese. Season to taste with salt and pepper. Mound mixture into reserved potato shells. Sprinkle with remaining cheese. Place potatoes in a single layer in a 2-quart square baking dish.
Bake, uncovered, in a 400F oven about 20 minutes or until golden brown and heated through. If desired, garnish with snipped chives. Makes 4 servings.

Make-ahead directions: Prepare as directed through Step 2. Place potatoes in a single layer in an airtight container. Cover and chill for up to 24 hours. Before serving, preheat oven to 325F. Place potatoes in a 2-quart square baking dish. Bake, covered, in the preheated oven for 30 minutes. Uncover and bake about 15 minutes more or until potatoes are golden brown and heated through.


Chicken Tortilla Rolls


1 pkg cream cheese, softened
3 tbsp Sweet Corn Relish
2 tbsp cilantro or parsley, chopped
½ cup shredded cheddar cheese
3 cups cooked chicken, diced in small pieces
1 tbsp Hot Pepper Relish
6 flour tortillas


1. Combine cream cheese, Sweet Corn and Tomato relishes, cilantro and cheddar cheese. Set aside.
2. In separate bowl, mix chicken with Hot Pepper Relish.
3. Spread cream cheese mixture on tortillas. Cover with chicken mixture. Roll up tortilla and wrap in plastic wrap.
4. Chill 2 hours or overnight.
5. Cut into ½”slices and serve with Tomato Relish.


Courtesy: www.simplyhomemade.ca

Ham and Cheese Baked Frittata


1/3 cup Vegetable Oil
4 cups frozen shredded potatoes or Idaho or Russet potatoes, peeled and shredded
1-1/2 tsp salt, divided
1/2 tsp freshly ground black pepper
1 lb baked ham, cut into 1/2-inch cubes
12 eggs
1/4 cup milk
1/2 tsp dried Italian seasoning, tarragon or oregano
2 cups shredded cheddar, Monterrey jack, or Swiss cheese
1-1/2 cups chunky salsa, heated


    Heat oven to 350ºF Heat oil in large (approx.10-inch/ 26 cm) skillet on medium heat. Add potatoes. Sprinkle with 1/2 teaspoon salt and pepper. Cook 8 minutes or until almost brown. Add ham. Cook 2 to 3 minutes more. Turn occasionally with spatula. In a bowl, blend eggs with milk, seasoning and remaining 1 teaspoon salt while potatoes are cooking. Place the potatoes into a greased 9" x 13", casserole. Stir the eggs into the potatoes. Bake covered with foil for 15 minutes. Remove from oven. Sprinkle with cheese and return to the oven. Bake 15 to 20 minutes more or until cheese is melted and eggs are set. Turn oven to broil and continue to cook about 2 minutes, or until top is nicely browned. Allow to cool 10 minutes before cutting into 8 to 10 servings. Serve topped with heated salsa.


Courtesy: www.simplyhomemade.ca

Adrenaline Juice


1/2 fifth Vodka
1 pint Everclear
1 pint Watermelon Liqueur
1 liter Sprite
pinch (Add To Taste) Sugar
1 can Red Bull


Best served in a Punch Bowl.

Made by the gallon
after all ingredients added then add a 5 hour energy shot
slowly stir for foaming effect


www.drinkswap.com

Pointsettia Cocktail


1 ounce dark rum
1 1/2 ounces light rum
1/2 ounce triple sec
1 ounce simple syrup
2 ounces pomegranate juice
1/2 ounce freshly squeezed lime juice


Combine all of the ingredients (except for the garnish) and ice in a cocktail shaker. Shake to chill.
Strain into a chilled glass. Garnish with a raspberry-mint skewer and serve.


www.consciousfeast.com photo M. Rodruguez

Peppermint Patty


1 ounce white or bittersweet chocolate
1 1/2 ounces vodka
1/4 ounce green crème de menthe
1/2 ounce white crème de cacao
1/4 ounce simple syrup

Melt the chocolate on a saucer in the microwave on low.
Roll the rim of the glass through the melted chocolate to create a chocolate “lip.”

Combine all of the remaining ingredients (except for the garnish) in a cocktail shaker with ice. Shake to chill.

Strain the cocktail into the chocolate-rimmed glass and garnish with fresh mint.


Photo: .consciousfeast.com directions: consciousfeast.com

Flaming Asshole


1/2 oz grenadine syrup
1/2 oz green creme de menthe
1/2 oz creme de bananes
1/2 oz overproof rum

Layer in this order: grenadine, creme de menthe, banana liqueur, white rum. Ignite rum before serving. Server with a straw.


Photo: .getfrank.com directions: drinksmixer.com

Glass Etching


Important note: When using glass etching cream exercise caution. It contains an acid that dissolves a fine layer from the glass and it can cause damage to skin and surfaces. Protect hands and arms with long sleeves and gloves and work in a well-ventilated area. Cover the area where you're working (it should be over a sink) with plastic and poke a hole in the center so that water can go down the sink. (Glazed surfaces such as porcelain will be permanently damaged by glass etching cream so be very careful). 
 
Find an old mirror that looks like it could use a pick-me-up. Flea markets, yard sales and antique shows are great places to look. If it's your first time etching glass don't spend too much money on it. Become comfortable with the process before etching an expensive mirror.
Clean and dry the glass surface with a soft, lint-free cloth.
Trace the design onto a shelf-liner and then cut it out using a sharp utility knife. 
 
Place the paper onto the mirror making sure it is stuck to the glass with no bubbles or creases. 
 
Use a small paint brush to fill in the stencil with glass etching cream. Use a thick, even layer and leave it on for the recommended time according to the manufacturer's instructions (usually 5-10 minutes).
Remove the cream. If it's reusable (it will say on the container) scoop it back into the container. If not, remove it with damp paper towels or a sponge. Make sure to get it all off. 
 
Peel off the paper and admire your handiwork. 


Photo:www.inspiredhomedecals.com Directions: familycrafts.about.com

Easy fleece blanket


Fabric needs to be at least 40 inches or wider (most are 54 inches)
Sizes of desired blanket
Baby/Toddler - 1 to 1 1/2 yards (in both fabrics)
Child - 1 3/4 yards (in both fabrics)
Teen/Adult - 2 yards (in both fabrics)

Feel free to make your blanket(s) bigger for taller or bigger people or to fit a twin sized bed.

Two pieces of fleece the same size. Piece may be the same pattern, two different patterns, two plain colors or a pattern on one side and a plain color on the other. Basically whatever you think the person you are making the blanket for will like.

Scissors (sharp ones)
Tape measure or yard stick
one 4" x 4" piece of paper

Easy fleece blanket instructions: 

 
1) Take your two pieces of fleece. Put one piece on top of the other lining up the edges so they are even. (one side will be the front and the other side will be the back of your blanket. 
 
2)Trim off any selvage around the edges of your fleece (try not to cut in more than 2 inches) Try to cut the salvage off as straight as you can. The nice thing about tying the blankets is that if you aren't exactly straight it will not show too much.

3) Take your piece of 4"x4" paper lay it on the corner of your blanket. Then cut out the corner through both layers. Proceed to do this on all four corners. This will keep you blanket square once you start to tie your fringes.

4) Now you are ready to cut your fringes. Cut 4 inches into both fleeces at 1" wide.

5) Your fringes don't need to be 1" exactly, just try to keep them the same size.( You don't want to have one fringe 1" and the next one 2".) Cut 1" intervals on all four sides.

6) Starting on one side, tie double knots (using one fringe from each fleece.) Tie these knots on every other fringe around the entire blanket.

7) Then flip the whole blanket over and tie the remaining knots until your blanket is complete.

If your blanket ties should ever come loose after wash and wear simply retie them.


Photo: leafytreetopspot.blogspot.com /www.the-best-homemade-gift-ideas.com

Homemade Clay Christmas Ornaments

       
4 cups flour
1 cup salt
1 teaspoon alum
1 1/2 cups water
Food coloring (optional)
Large bowl
Cookie cutters, drinking straw, and fine wire (optional)
Baking sheet
Fine sandpaper
Plastic-based poster paint, acrylic paint, or markers
Clear shellac, acrylic spray, or nail polish


1. Mix flour, salt, alum, and water in bowl. If dough is too dry, knead in another tablespoon of water. 
 
2. Dough can be colored by dividing it into several parts and kneading a few drops of food coloring into each part. 
 
3. Roll or mold into ornaments.
 
To roll: Roll dough 1/8 inch thick on a lightly floured surface. Cut with cookie cutters dipped in flour. Make a hole for hanging by dipping the end of a drinking straw in flour and using the straw to cut a tiny circle 1/4 inch from the ornament's edge. You can also use the straw to cut more clay dots for use as decorations.
To mold: Shape dough into figures such as flowers, fruits, animals, and so on. The figures should be no more than 1/2 inch thick.

4. Insert fine wire in ornaments for hanging. 
 
5. Bake ornaments on an ungreased baking sheet for about 30 minutes at 250ºF.

6. Turn and bake another 90 minutes until hard and dry. 
 
7. Remove from oven and cool, then smooth with fine sandpaper. 
 
8. Decorate both sides of ornaments with plastic-based poster paint, acrylic paint, or markers. 
 
9. Let dry and seal with clear shellac, acrylic spray, or nail polish. Makes about five dozen 21/2-inch ornaments.


fun.familyeducation.com www.the-best-homemade-gift-ideas.com

Blue Ninja


6 oz Vodka
2 oz Blue Raspberry Kool-Aid
Mix together with crushed ice in a glass and garnish with mint leaves

Click to Absinthe Site: http://absinthe.bz/


Photo Credit: www.blogadilla.com www.idrink.com/

Bellini


2 oz (60 ml) white peach purée
5 oz (150 ml) prosecco sparkling wine
ice


Pour peach purée then prosecco into a mixing glass filled with ice.
Gently roll the shaker end over end to mix the ingredients.
Do not shake as shaking will make the prosecco flat and could cause the mixing glass to explode.
Strain into a champagne glass and serve.


Photo Credit: blogs.chron.comWikibooks Bartending Guide—original source of recipe, licensed under the GNU Free Documentation License

Mint Julep


3 oz bourbon whiskey
5 – 6 sprigs of mint
1 tsp sugar


Crush the sugar with four sprigs of mint in the bottom of the glass.
Fill the glass with crushed ice and then add the bourbon. Feel free to add more bourbon to fill the glass, if necessary.
Garnish with remaining mint.


Photo Credit: southernbellejm.blogspot.com Wikibooks Bartending Guide—original source of recipe, licensed under the GNU Free Documentation License

Vampire Kiss Martini


1 1/2 oz Finlandia Vodka
1 1/2 oz Korbel Champagne
3/4 oz Chambord
red sugar for rimming


Rim the glass with red sugar (use food coloring) or drop in a set of wax vampire teeth for a real surprise.
Pour vodka and half of the Chambord in a martini glass.
Top with Champagne.
Pour the remaining Chambord over the back of a spoon to make it float.


Photo Credit: © Finlandia Vodka

Wolf Bite Shooter


1 oz LUCID® Absinthe
1 oz Midori® Melon Liqueur
1 oz lemon-lime soda
1.5 oz pineapple juice
Drizzle of grenadine


In a cocktail shaker, add LUCID® Absinthe, Midori® melon liqueur, pineapple juice, and ice.
Shake vigorously and strain into 2 ounce shot glass. Splash lemon-lime soda on top and a drizzle of grenadine


Photo Courtesy: © Lucid Absinthe

Chocolate Covered Peanut Butter Cheesecake Pops


Cheesecake:

  • 1 1/2 cups dark brown sugar
  • 1 1/2 pounds cream cheese, at room temperature
  • 1/2 cup heavy cream
  • 2 large egg yolks
  • 1 tablespoon pure vanilla extract
  • 1 3/4 cups creamy peanut butter

Chocolate:

  • 5 tablespoons vegetable shortening
  • 12 ounces semisweet or bittersweet chocolate chips

Directions

Wooden pop sticks
For the cheesecake: Position a rack in the middle of the oven and preheat to 325 degrees F. Line a 8 by 8-inch baking pan with foil letting long flaps overlap on each side. Spray foil with nonstick spray.
Break up the brown sugar to remove all lumps. In a standing mixer with the paddle attachment, beat the cream cheese and sugar on medium speed until very smooth. Add the cream and beat slowly; then add the yolks and vanilla mixing until just combined. Gently stir in peanut butter. Take care not to over beat the mixture; this incorporates too much air and causes the cheesecake to crack. 
 
Pour and evenly spread the batter in the prepared pan. Bake for 15 minutes. Open the oven to release some heat, then lower the temperature to 200 degrees F. Continue to bake the cheesecake until the outside is set but the center is still loose, for about 45 minutes. Turn off the oven, and cool cheesecake in the oven for 45 more minutes. Cover and refrigerate at least 8 hours or overnight. 
 
Lift cheesecake from the pan by lifting up the foil. Transfer to a cutting board. Cut into 1 1/2-inch cubes. Stick a wooden pop stick halfway into each bar and freeze for 1 hour. 
 
Meanwhile, put the shortening and chocolate in a medium heatproof bowl. Bring a saucepan filled with an inch or so of water to a very slow simmer; set the bowl over, but not touching, the water. Stir the chocolate occasionally until melted and smooth. Remove from the heat and let cool slightly. (Alternatively, put the chocolate in a medium microwave-safe bowl. Melt at 50 percent power in the microwave until soft, about 1 minute. Stir, and continue to heat until completely melted, about 1 minute more.) 
 
Dip the pops into the chocolate mixture, and stand on waxed paper to set, about 5 minutes. Serve cold (straight from the fridge), or freeze up to 2 weeks. Frozen pops make a cool summer treat, or can be allowed to temper for 10 minutes at room temperature before serving.
Upgrade: Coat the pops with chopped nuts or candies for a really decadent finish. To do this let the dipped pops drip over a bowl for 15 seconds before rolling them.


Photo and Copyright 2007 Television Food Network, G.P. All rights reserved

Jolly Rancher


1 oz Three Olives Green Apple Vodka
1 oz peach schnapps
4 oz cranberry juice
orange wedge for garnish


Pour vodka and schnapps into a highball glass filled with ice and top with cranberry juice.
Garnish with an orange wedge.


Photo and recipe courtesy of: © Three Olives Vodka

Barbie Shot


1 oz Malibu® coconut rum
1 oz Absolut® vodka
1 oz cranberry juice
1 oz orange juice

You can make it in shot form or drink form. If serving as a drink, put sugar on the rim for extra flare.


www.lovelyish.com

3 Dollar Hooker


1 oz Bailey's® Irish cream
1/2 oz Captain Morgan® spiced rum
1/2 oz Rumple Minze® peppermint liqueur

Stir ingredients in a cocktail shaker with ice. Strain into shot glasses.


Photo: http://blog.theyoungconnoisseur.com